The Making Of: Ice Throne & Bench with Nadeau's Ice
- jesicagrafer

- Jan 5, 2021
- 5 min read
Updated: Feb 16, 2021
I have always been fascinated with those TV Shows like Unwrapped, How Its Made, and then of course once I got more into food Good Eats, DDD, and so many others. What these things all have in common is that you get to see how they do it! So, how do you make an ice throne and an ice bench that weighs roughly a ton and has beautiful glittery embellishments? Well, with an ice block of course. Not just one ice block, but about a dozen ice blocks. And a lathe, a CNC, a Clinebell, a chainsaw, a bandsaw, a huge blowtorch, a bunch of red glitter, even more perfectly sifted snow... so maybe this isn't one of those things you can go try at home afterwards. But, still absolutely mesmerizing to see. And, I must say, makes you feel like arctic royalty when you sit on it!
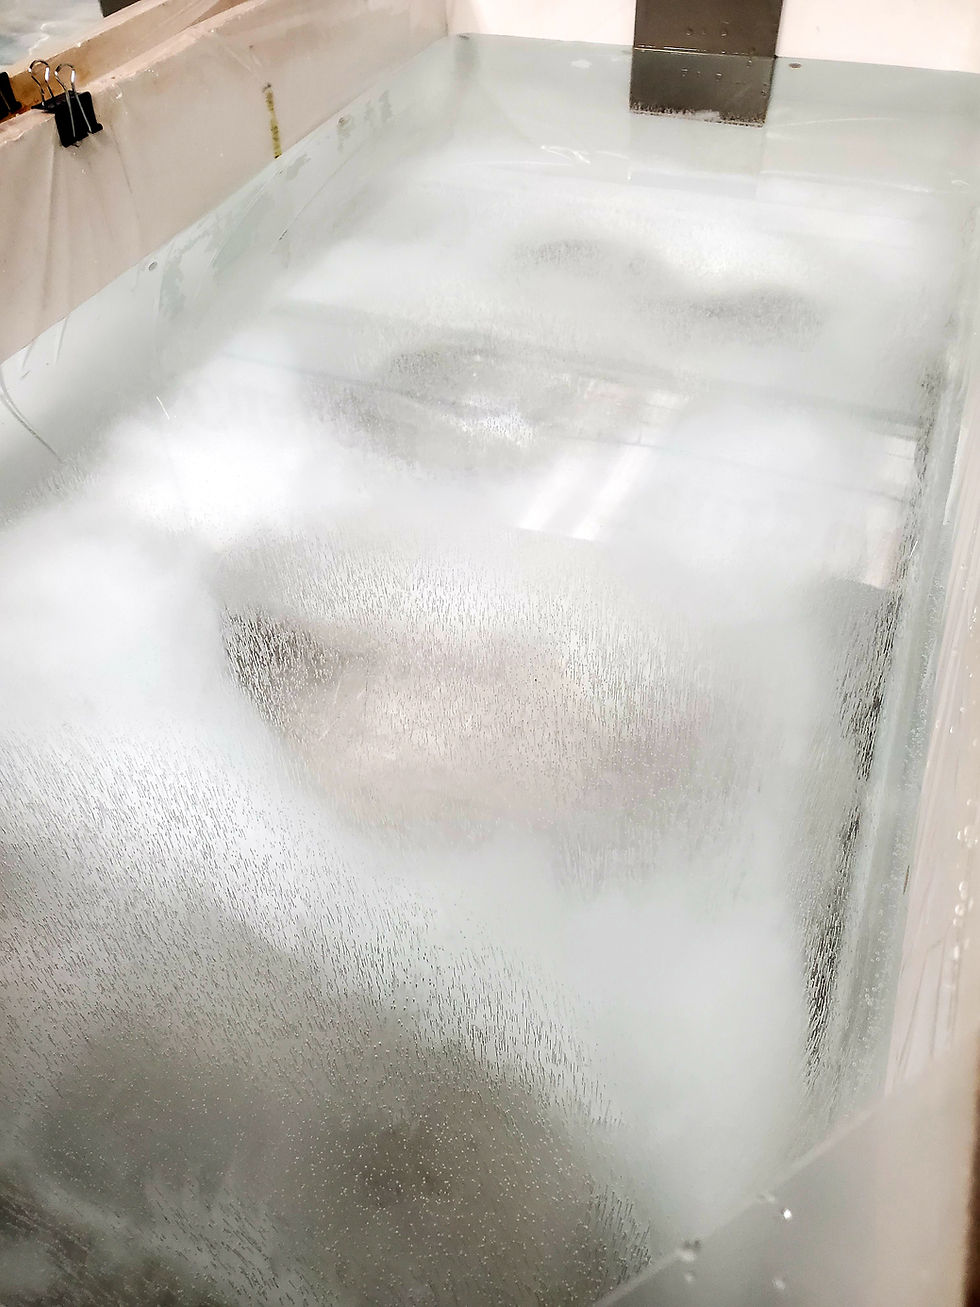
Below, you can see how the ice blocks are made. It's not a glamorous setup, but the outcome is absolutely amazing. It starts by filling these Clinebell machines with ultra filtered water, then freezing them slowly over the course of a couple days, depending on a few temperature variables. As it freezes, we remove impurities as much as possible and add more water gradually to freeze slowly. All of the air bubbles are removed through the gradual freezing process in these machines that leads to a beautifully clear ice block, weighing in at about 400 pounds and measuring roughly 40" x 20" x 12".
This block is tempered and ready to be removed from the Clinebell, and we do that using a system of pulleys and motors that mechanically lift it out with chains and a metal bar and onto a dolly. Or, if it's more exciting for you to imagine, we can pretend that I lift them out with my mind. ;)
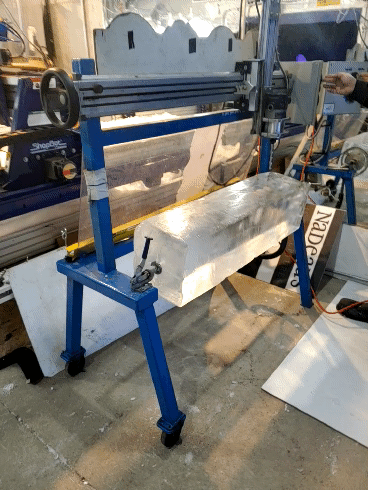
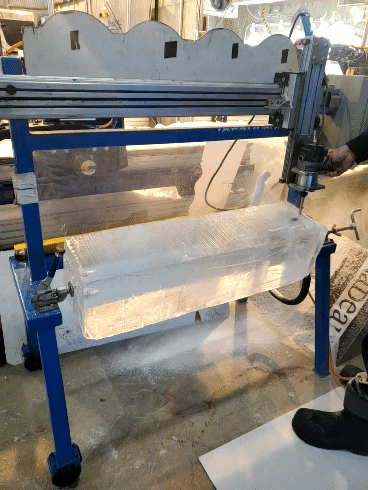
Then, we cut them with a bandsaw so that they're perfectly flat on the top (when they freeze, the have a "belly" on them, just like ice that you freeze at home). At that point, they're completely usable ice blocks for anything from a hand carving to a CNC piece. For the throne and bench, we actually used the bandsaw to take those blocks and cut them in half lengthwise to create the piece that fits on the lathe below and to construct the legs of the bench. Using the lathe to create a finished product of a column with four rounded sections will make it easier for us to slice apart, sand with a cone sander, smooth with a bag of hot water, and turn into the sphere embellishments on the arms of the throne. Pretty innovative thinking to get four large matching spheres of ice, which is no easy challenge whatsoever.
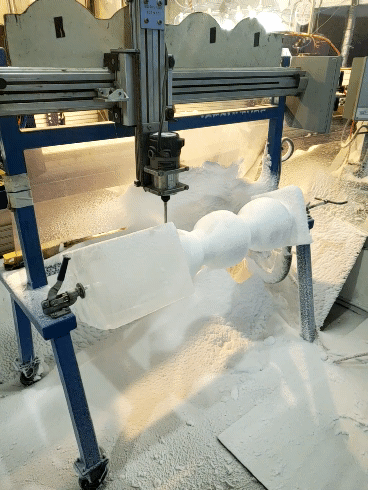
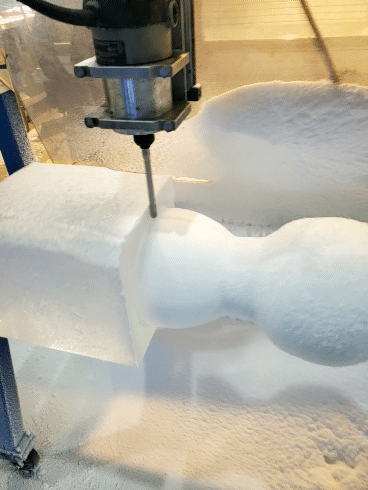
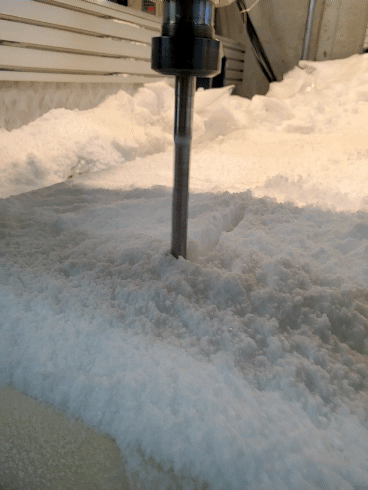


After we're finished with the lathe, it's time to take all of the slices of ice (funny that we call them slices, I think more about a slice of cake... :) ), but we slice these off of the full blocks of ice to put on the CNC. Above, you can see the large drill bit going through what looks like just a bunch of snow. Below that is a block of ice being cut into a specific design programmed and run by the CNC. That is how we can make perfect logos and carvings that can be easily replicated for matching carvings. For a little context of how large of scale things are, the photo of the freezer above is of the lathe and three CNCs that go all the way back to the far end of the freezer.
After the CNC is complete, it's time to clean all of the snow off of the etched pieces. We do that by meticulously tracing the inscription in the ice with a dull ice pick (so that we don't crack the smaller parts) to loosen the snow, then following up with a gentle blast from the air compressor to fully remove all of the snow from the ice carving. At that point, we clean it of remaining snow with hot water (but not too much or the details of the design will melt away), lay the glitter in the pockets of the engraving, pack it in with snow so it stays in place, fuse the back plates of the throne on, and finish up with more snow to seal the seams.
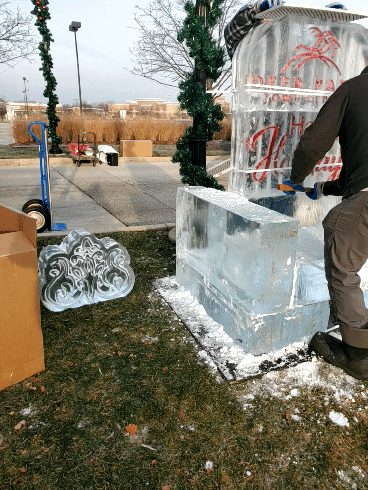
After packing, boxing, wheeling, strapping, loading, and unloading all of the pieces, it's time to start assembling! The base of the throne is pretty simple, just making sure the solid blocks are even and level on the ground, then scratching and snowing them into place on each other. After that, we start lifting the decorative pieces onto the back of the throne. To make sure each block solidly fuses to the block below, we use a scratchboard (pictured below) to scratch up the surface of the sides that will be fused, then follow up with snow in the seams.

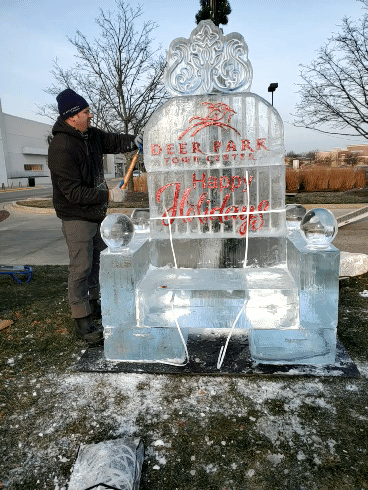
The final step that clears up all of the carvings and makes the whole structure a solid piece is using a huge blowtorch to melt off any excess snow or frost from the outside of the carving. It also seals all of the fuses and seams with warm water, which will make all of it structurally sound. Think of it like ice cubes in your glass at home, once you pour water on them, they all stick together.
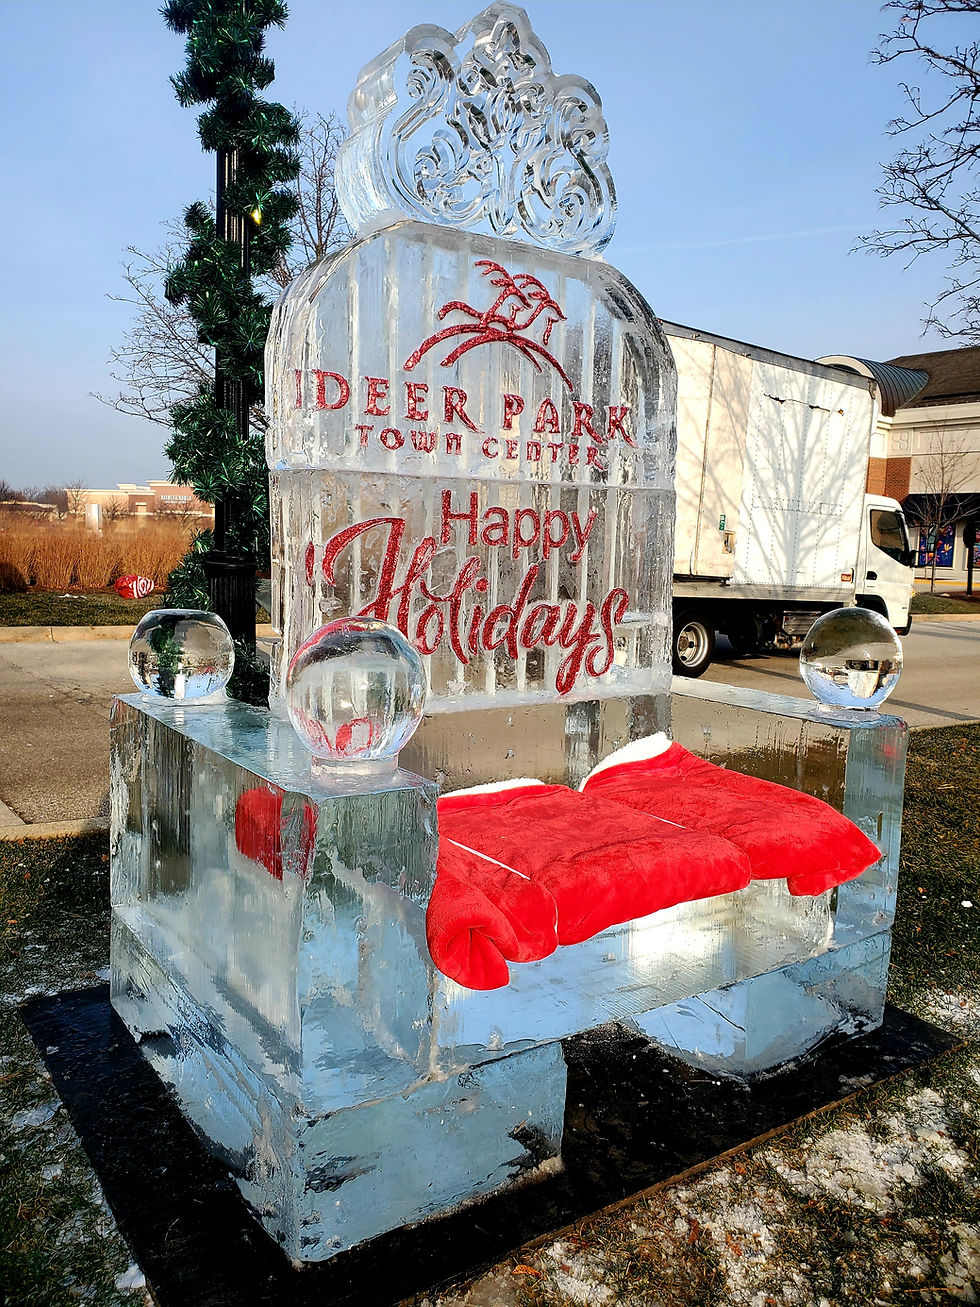
I have to say, the finished result of this ice carving had me completely in awe. Working on this project piece by piece and then getting to build it and actually sit on it like Elsa herself was amazing.

I never would have thought that I would be an ice carver, let alone be building ice thrones. The gratitude that I feel towards the people in my life that helped facilitate this is beyond words. JJC, Nadeau's Ice Sculptures, all of my friends and family that support me daily... I couldn't do it without you.


Below is a preview of the entire video of the assembly of the throne. If you head on over to the video tab at the top of this page or click here, you can enjoy the full time-lapsed video.
At the end of the day, they say you'll never work a day in your life if you love what you do. Lucky for me, I have loved what I've been doing in cakes, culinary, and certainly in ice, for the entirety of my culinary career thus far. Now, is it work to slowly freeze, harvest, slice, carve, embellish, load, unload and assemble an ice throne and bench? Um, yes. :) But, it's all worth it when you get to kick back and relax on the ice throne you built!


Comments